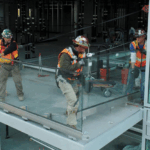

Repairing a shower cubicle frame can be necessary if there are cracks, dents, or other damages affecting its structural integrity. Here’s a detailed guide to help you through the process
Contact us for more information on shower cubicle frame repair services in Kenya at ;
Golden Moon Star Building, Ground Floor Junction of Kilimani rd & Ndemi rd Kilimani
+254 722 724 893
Tools and Materials Needed For Shower Cubicle Frame Repair
- Screwdriver
- Sandpaper
- Epoxy resin or wood glue (depending on the material of the frame)
- Clamps
- Paint or finish (if required)
- Replacement parts (if necessary)
Step-by-Step Instructions for a Shower Cubicle Frame Repair
Assessment
Inspect the Damage: Identify the extent of the damage. Check for cracks, dents, or loose joints.
Identify Material: Determine if the frame is made of metal, plastic, or wood. The repair method may vary depending on the material.
Disassembly
Remove Surrounding Components: If necessary, remove any shower doors, panels, or fittings attached to the frame.
Disassemble the Frame: Unscrew any screws or bolts holding the frame together. Take care not to damage surrounding areas.
Clean and Prep
Clean the Surface: Use a damp cloth to clean the damaged area and remove any dirt or debris.
Sand (if necessary): If the surface is rough or uneven, use sandpaper to smooth it out. This will help the adhesive bond better.
Repair the Damage
Fill Cracks or Holes: Apply epoxy resin or wood glue to fill any cracks or holes in the frame. For larger gaps, you may need to use a filler material like wood putty.
Realign and Secure Joints: If joints are loose, apply adhesive and use clamps to hold them together until the adhesive dries.
Reinforcement (if necessary)
Add Support: If the damage has weakened the frame significantly, consider reinforcing it with additional support. This could involve adding metal braces or wooden splints.
Allow for Drying Time
Follow Instructions: Allow the adhesive or filler to dry completely according to the manufacturer’s instructions. This may take several hours or overnight.
Reassembly
Put the Frame Back Together: Once the adhesive is fully cured, reassemble the frame by reattaching any removed components and tightening screws or bolts.
Finishing Touches
Paint or Finish (if necessary): If the repair has altered the appearance of the frame, consider painting or applying a finish to match the original aesthetics.
Replace Seals or Gaskets: If seals or gaskets were removed during disassembly, make sure to replace them to maintain the shower’s waterproofing.
Test
Check for Leaks: Before putting the shower back into regular use, test it to ensure there are no leaks or issues with the repaired frame.
Additional tips for shower cubicle frame repair
Safety First: Wear protective gear such as gloves and safety goggles when handling tools and materials.
Follow Instructions: Always read and follow the manufacturer’s instructions for any adhesives or materials used in the repair.
Seek Professional Help if Needed: If you’re unsure about the repair process or if the damage is extensive, consider seeking assistance from a professional handyman or repair service.
By following these steps carefully, shower cubicle frame repair should be easy, seamless and effective. Ultimately you will restore its functionality and appearance.
Related Article: Shower Cubical Rejuvenation
Follow us on Facebook to get regular updates