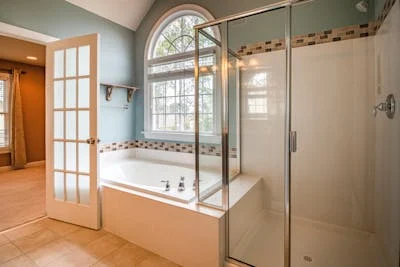
A sliding shower cubicle door installation can significantly enhance the aesthetics and functionality of your bathroom. Whether you’re renovating or just looking to upgrade your shower, this detailed guide will walk you through the process. We’ll cover the tools you need, step-by-step instructions, and tips for a seamless installation.
For shower cubicle installation in Nairobi, Kenya
Contact us
Golden Moon Star Building, Ground Floor Junction of Kilimani rd & Ndemi rd Kilimani
+254 722 724 893
Tools and Materials Needed
Before you start, gather the following tools and materials:
- Sliding shower door kit
- Measuring tape
- Level
- Drill
- Screwdriver
- Caulk and caulking gun
- Masking tape
- Safety glasses
- Pencil
- Hammer
- Hacksaw (if necessary)
Step-by-Step Shower Cubicle Door Installation Guide
1. Measure Your Shower Space
Accurate measurements are crucial for a perfect fit. Measure the width and height of your shower opening at three points: the top, middle, and bottom. Use the smallest measurement to ensure the door fits properly. Note these measurements for later reference.
2. Prepare the Area
Clean the shower area thoroughly, removing any old caulk or debris. This will ensure a clean and secure fit for your new sliding shower door. Lay down a drop cloth to protect your shower base from scratches or damage during the installation process.
3. Install the Bottom Track
- Cut the Track (if necessary): Measure the bottom track against the shower opening and cut it to fit if needed. Use a hacksaw for precise cuts.
- Position the Track: Place the bottom track on the shower base, ensuring it’s centered and level. Use a level to check alignment.
- Secure the Track: Mark the drilling points through the holes in the track, then remove the track. Drill pilot holes and apply a bead of silicone caulk along the bottom before placing the track back in position. Secure it with screws.
Read also: DIY Glass Shower Cubicle Repairs
4. Install the Side Tracks
- Align the Side Tracks: Position the side tracks on the walls, ensuring they are plumb (vertically level). Use a pencil to mark the drilling holes.
- Drill Holes: Drill pilot holes at the marked points. If drilling into tile, use a carbide-tipped drill bit.
- Attach the Tracks: Apply silicone caulk along the back of each side track, then secure them to the walls with screws.
5. Install the Top Track
- Measure and Cut (if necessary): Measure the top track against the shower opening and cut it to fit if needed.
- Position and Secure: Place the top track over the side tracks, ensuring it fits snugly. Secure it with screws through the pre-drilled holes.
6. Install the Doors
- Attach Rollers: Attach the rollers to the top of each door panel according to the manufacturer’s instructions. Ensure they are securely fastened.
- Hang the Doors: Lift the first door panel and hang it on the top track. The rollers should glide smoothly along the track. Repeat with the second door.
- Adjust the Doors: Adjust the rollers and door stops to ensure the doors slide smoothly and close properly. Most doors have adjustable rollers for this purpose.
7. Install the Door Handles and Seals
- Attach Handles: Install the door handles according to the manufacturer’s instructions. This usually involves securing them with screws or adhesive strips.
- Install Seals: Attach the door seals to prevent water from leaking. These can be fitted along the edges of the doors and the bottom track.
8. Apply Finishing Touches
- Caulk the Edges: Apply a bead of silicone caulk along the edges of the side tracks, top track, and bottom track to seal any gaps and prevent water leaks.
- Clean Up: Remove any excess caulk and clean the area thoroughly. Make sure all components are securely fastened and the doors operate smoothly.
Tips for a Successful Shower Cubicle Door Installation
- Double-Check Measurements: Always measure twice to ensure accuracy.
- Use Proper Safety Gear: Wear safety glasses and gloves when cutting materials or drilling.
- Follow Manufacturer’s Instructions: Refer to the specific instructions provided with your shower door kit, as designs can vary.
- Ask for Help: Sliding shower doors can be heavy and awkward to handle alone. Having an extra pair of hands can make the installation easier and safer.
A sliding shower cubicle door installation can be very rewarding as the DIY project that adds value and style to your bathroom. By following these steps and taking your time, you can achieve a professional-looking result. Enjoy your new shower door and the improved functionality it brings to your bathroom space.
For more home improvement tips and guides, stay tuned to our blog!


